Fig. 10.1

Fig. 10.2

Fig. 10.3

Fig. 10.4

Fig. 10.5
... I find them a useful vehicle for stitching samples, to illustrate a poem or a topic that has relevance to me, or just a place to play with a new technique. When you've been stitching for as long as I have you don't have a great deal of wall space left to display your work and a book sits on a shelf and takes up a very small amount of space.
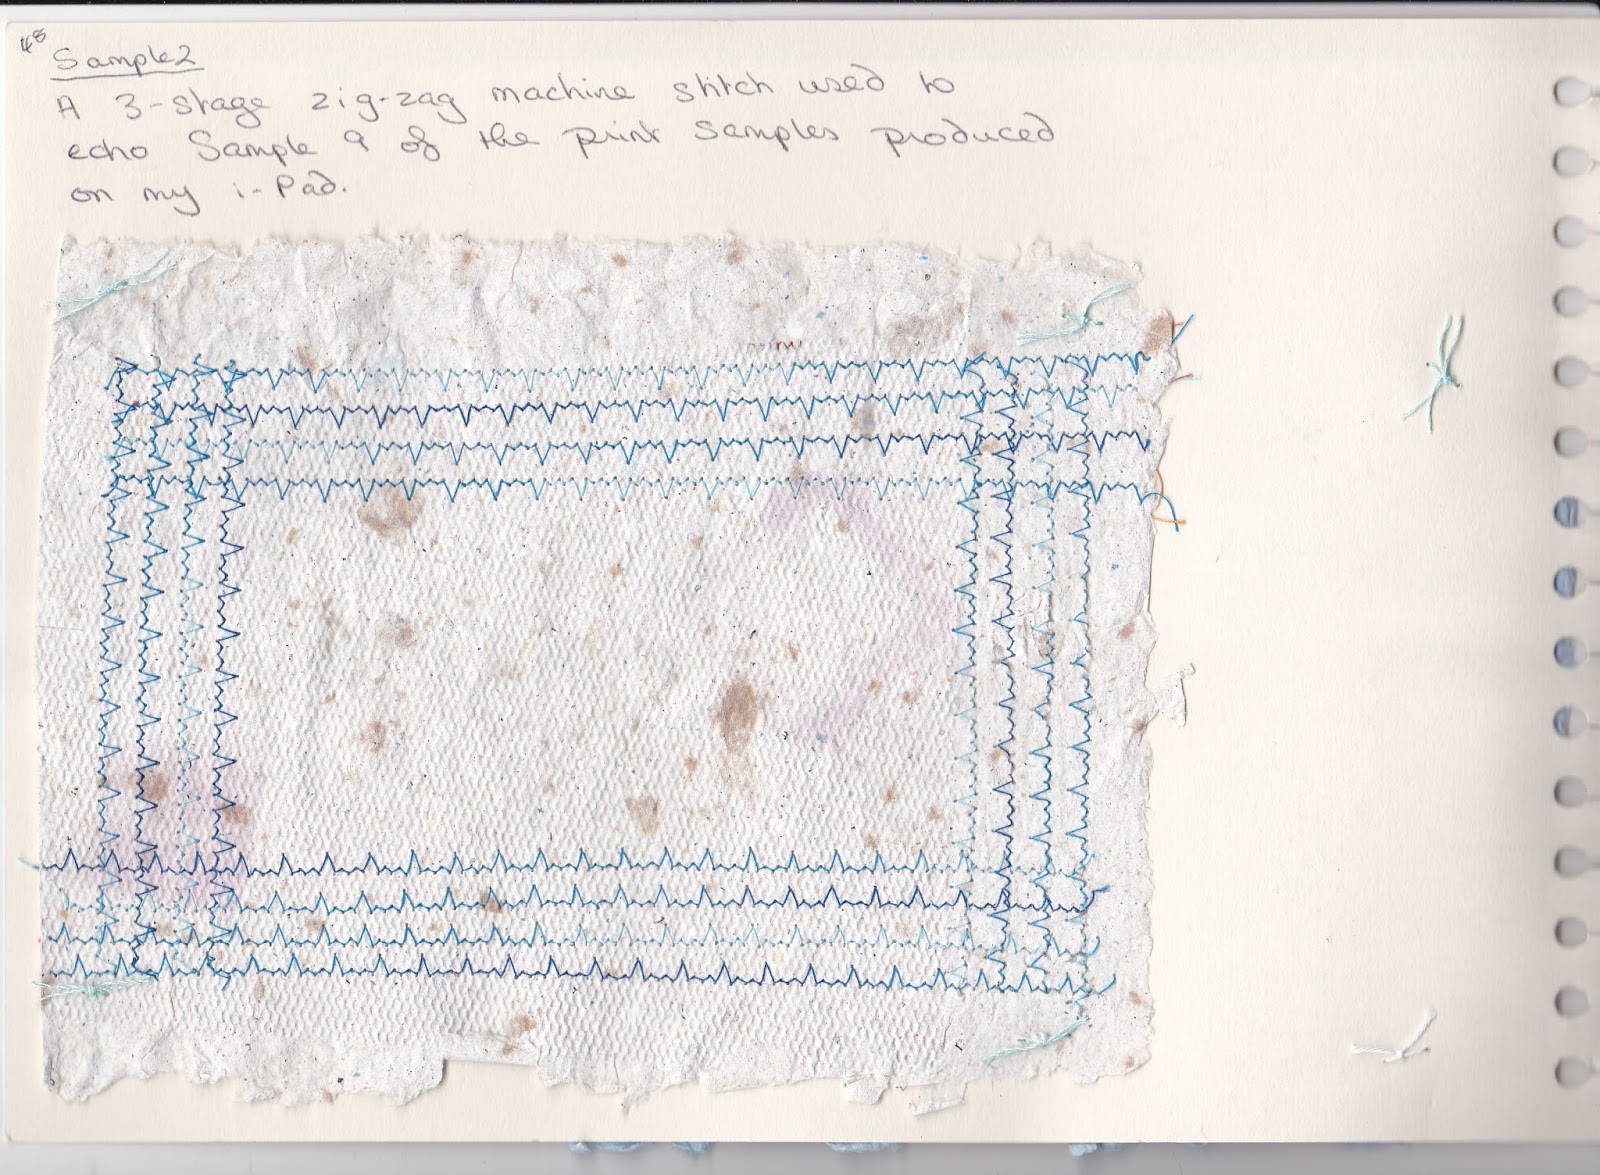
For this chapter we had to make samples of books which we might (or might not) end up using as our final piece of work for this module.

Fig. 10.6
I began by working some samples of Japanese stab bindings ... and might have got a little carried away!
Fig. 10.7
I know that in theory the binding is supposed to look identical on the back and front (or at least make an equally attractive pattern on the back of the book) and not all of these do that as. There are a couple where I just could not work out how to do the journeys up the binding and back in the same way, and some I think were just a little over-ambitious.
Fig. 10.8
Fig. 10.8 shows just two examples made up into actual books.
Fig. 10.9
My next little group of books were made to a simple pamphlet design. The one on the left is a single pamphlet with a cover.
Fig. 10.10
The second little book in Fig. 10.9 is made up of 5 pamphlets which were stitched together over ribbons, which were then threaded through slits cut in the cover and the ends glued in place to hold them firm.
Fig. 10.11
The right hand book in Fig. 10.9 has pages of different lengths, which make an attractive little book where you can see glimpses of what is on each page.
Fig. 10.12
This book has pages glued into a concertina'd piece of paper, which was then attached to the back cover. 
Fig. 10.13
Fig. 10.13 shows two books where the cover is a longer piece of paper folded to enclose two little pamphlet books. I think this, or a variation of one of them, might be a definite contender for my final piece!
Fig. 10.14
A couple of years ago I went on a two day book-binding workshop at our local art supply shop and this was one of the samples I made there. It is a 'proper' book with board covers and a spine of bookbinders linen.
Fig. 10.15
These are two more samples made at the same workshop. The green one again has board covers with a separate piece of board as a spine covered again in bookbinders linen. The purple book is a concertina with board covers attached.
Fig. 10.16
The book in Fig. 10.16 meanders along, each page is attached to the next with a strip of fabric which has been machine stitched to each pair of pages. A variation on the 'puzzle' books which follow!

Fig. 10.17

Fig. 10.18
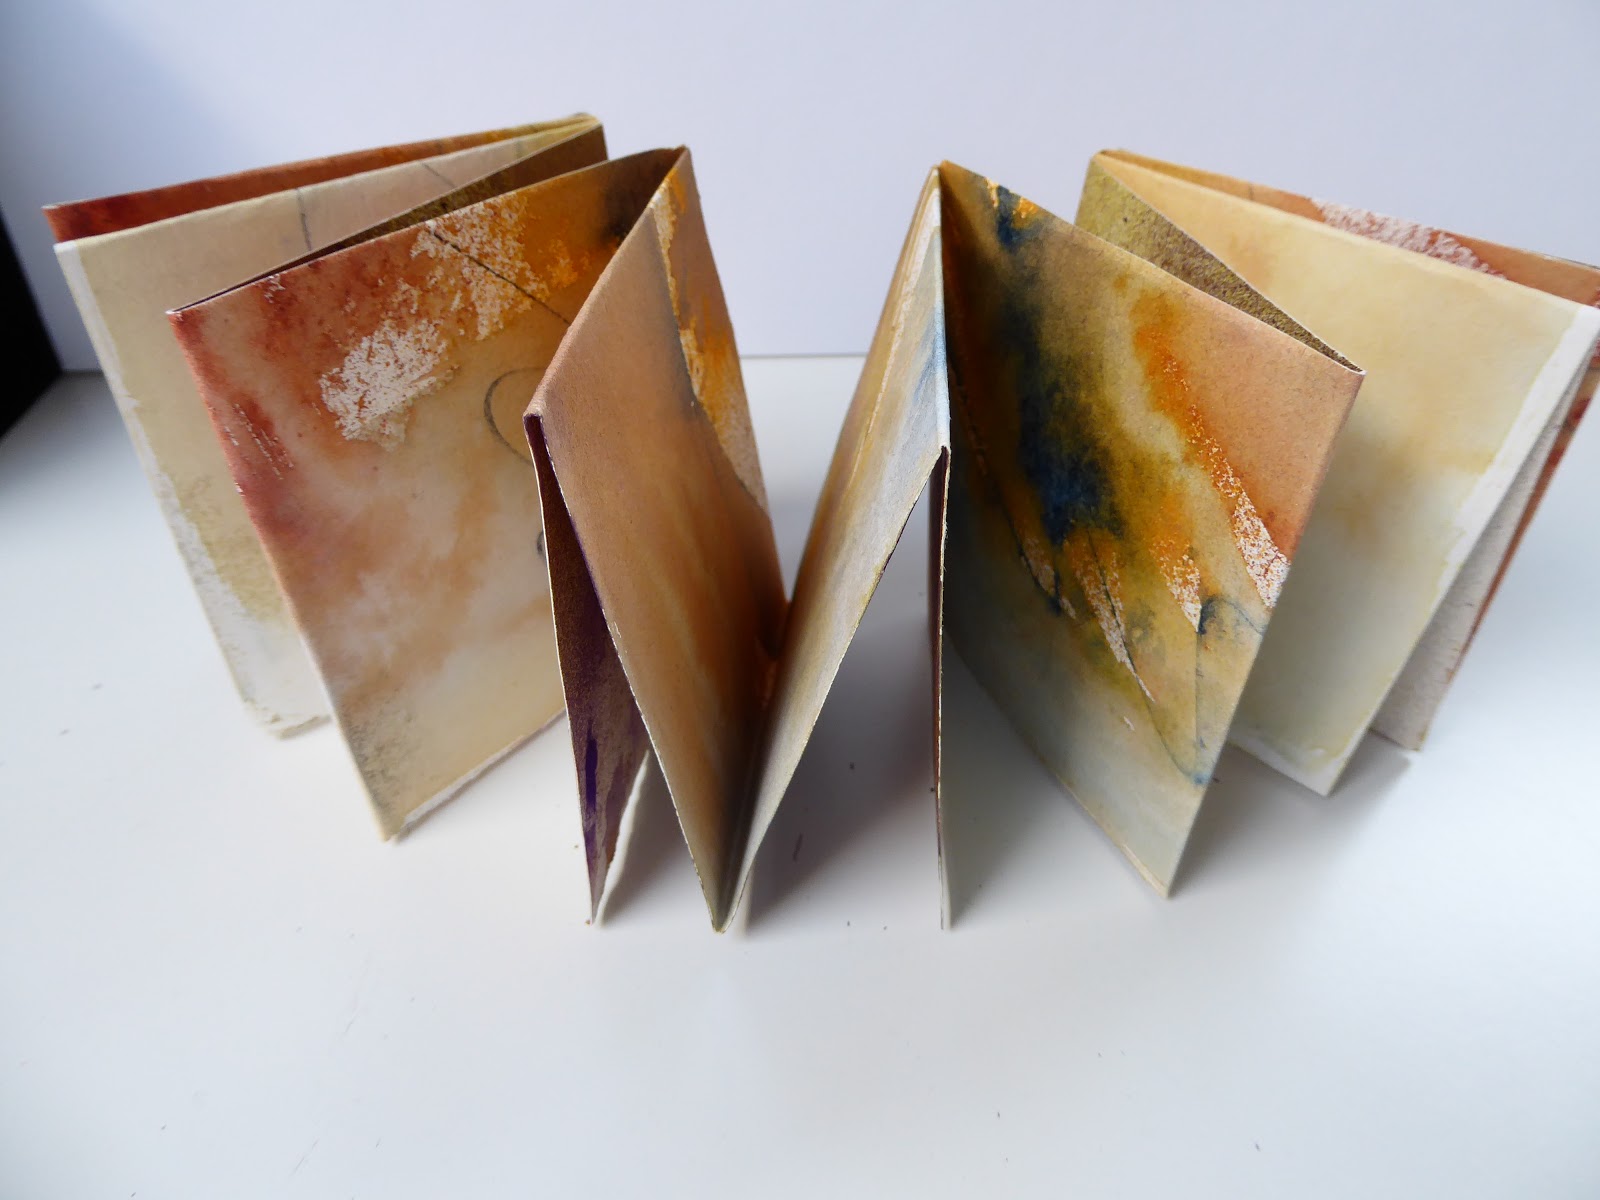
Fig. 10.19

Fig. 10.20

Fig. 10.21

Fig. 10.22

Fig. 10.23
The books in Figs. 17-23 were each made from a single sheet of paper which was cut into in various different ways then folded up. I love making these from paper on which I've made random marks as the resulting pages often end with lovely abstract designs which just inspire me to want to stitch.

Fig. 10.24
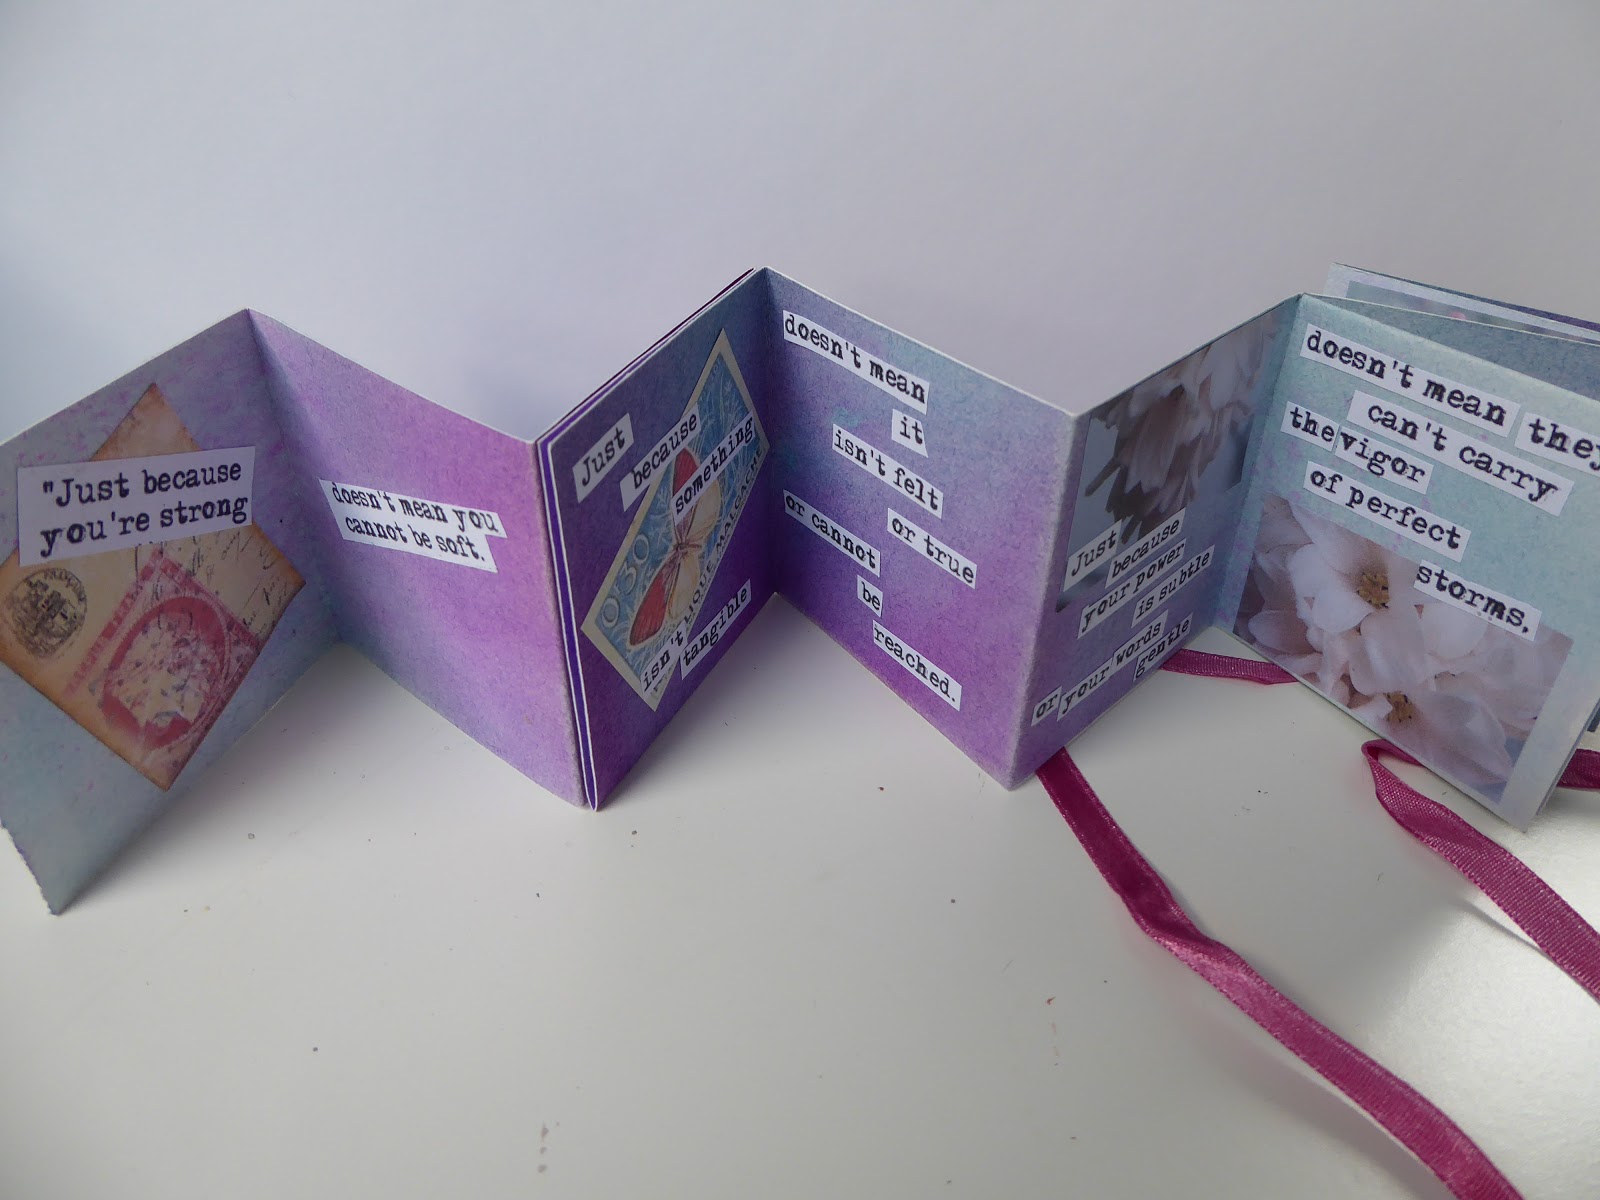
Fig. 10.25

Fig. 10.26

Fig. 10.27

Fig. 10.28