Evaluation of
Functional 3-dimensional embroidered item
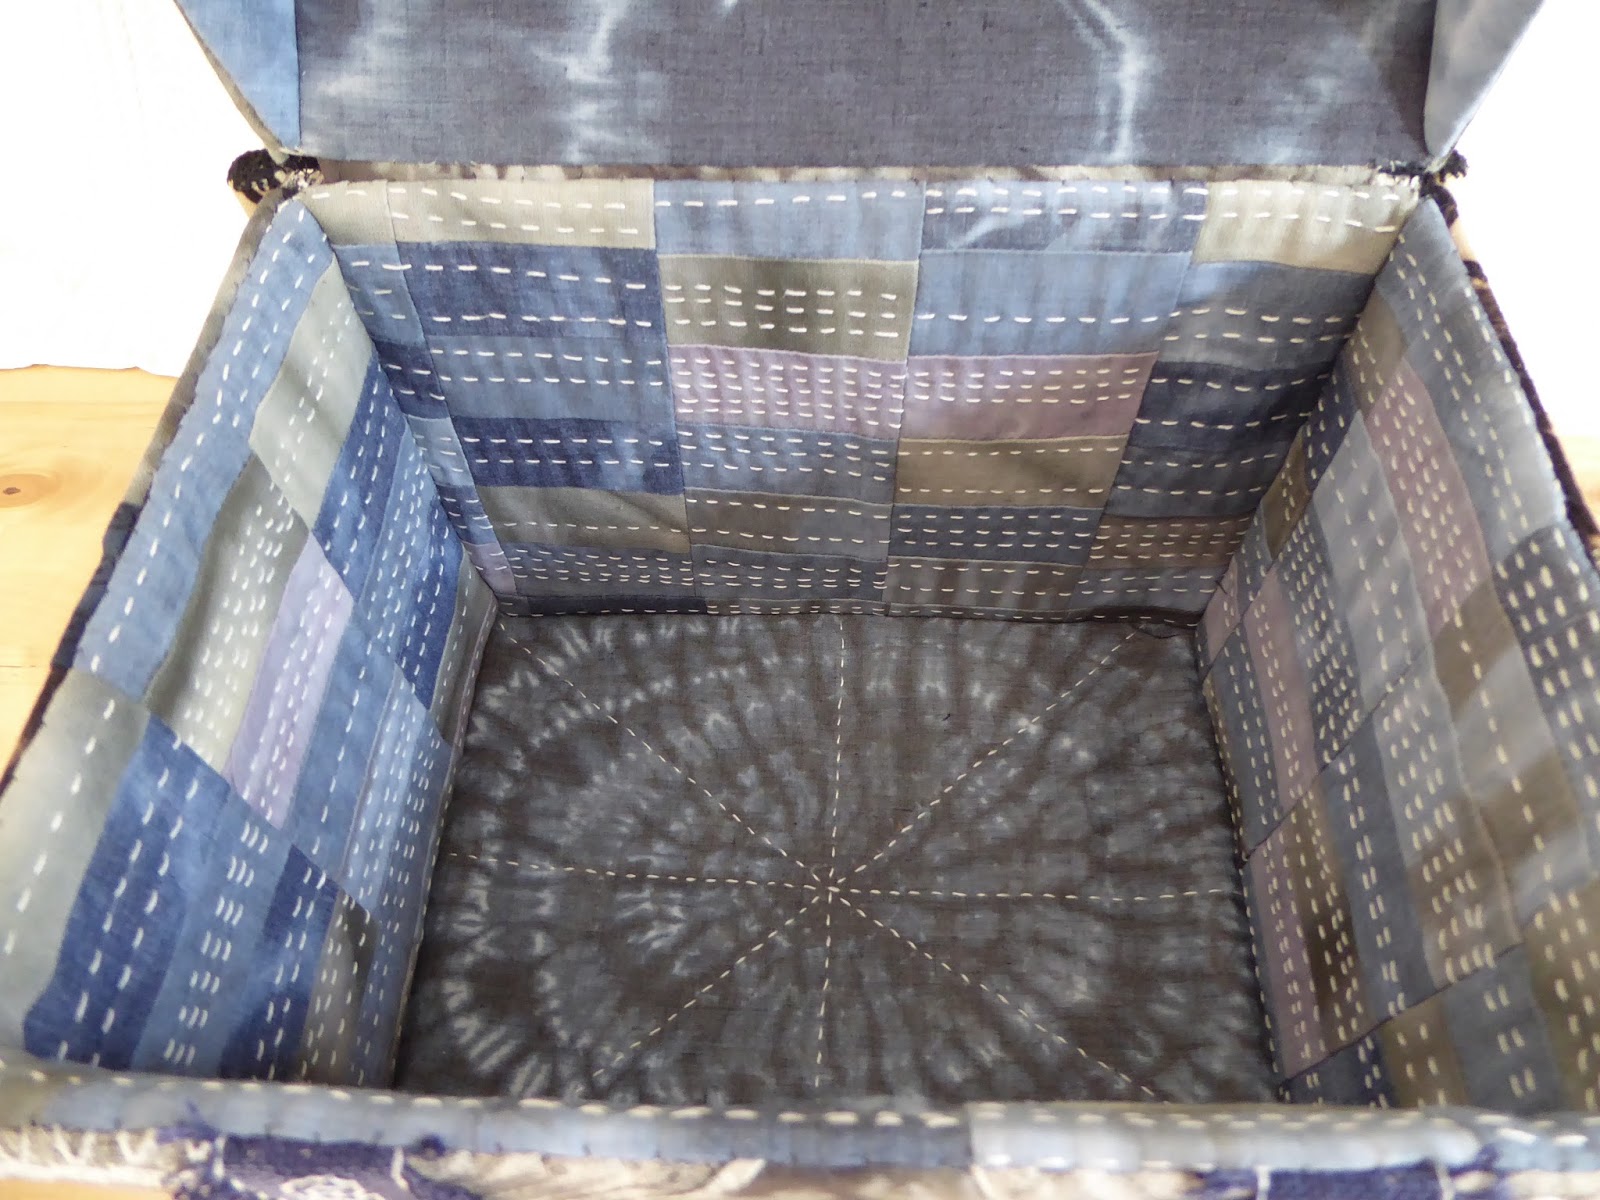
My final item is a box with hinged lid inspired by ancient
reliquaries seen in the Victoria and Albert Museum
in London, the markings and features of a lizard
and Gaudi’s dragon back roof on the Casa Batllo in Barcelona.
How do you feel about
the resulting conclusion?
I am delighted with my box. I feel it answers the brief of
producing a three-dimensional useful object inspired by animal print, utilising
pieced, hand-dyed fabric and embroidery. I learned several new processes in
this module, many of which I used to construct my box. I also overcame a number
of small challenges, which made the whole process a very enjoyable and
worthwhile learning exercise.
Is it fit for its
purpose – give reasons
My box is indeed fit for purpose. It is of sturdy
construction with a hinged lid which fastens securely with a button and ties.
It is large enough to hold quite a substantial amount and it is attractive
enough to keep on display in my home.
If you were asked to
make it again, what changes would you make to the way you designed it and the
way you made it?
If I were to make the box again I would make the lid a
little larger than the body of the box to enable it to rest properly on the
corner supports. I would probably do more surface machine embroidery on more of
my fabrics before cutting and piecing them. I would also use more of the seam
finishes which I sampled during the module and which then got largely forgotten
in the concerns about getting the cutting and piecing done correctly.
Storage of work,
materials, tools and equipment.
·
Papers and design work are stored flat in
folders. I use a spiral bound sketchbook in which I keep samples and notes.
These are kept in my study.
·
Inks, paints, dyes and glue for design work are
stored upright in separate drawers in my garage workroom.
·
Bleach is stored securely in a cupboard
inaccessible to my cat (no small children ever visit my home but it would be
safe from them too).
·
Embroidery work in progress is kept in a
purpose-made pouch. I have many of these, made over the years, in which I keep separate
projects together with their relevant threads, beads etc.
·
Pins and needles – pins are stored in a small
tin, needles are separated by type in a needlebook. Both are kept in a basket
which travels with me from room to room so it is always accessible when needed.
·
Fabrics are stored, folded, in boxes according
to type of fabric. The boxes are stored in a wardrobe in my sewing room.
·
Threads are stored in boxes according to type,
use and colour. These boxes are stored on shelves in my study.
·
Sewing machine is kept covered when not in use,
on a worktable in my sewing room.
·
Other electrical equipment is stored securely in
a box in my garage workroom, each item with its flex tightly wound around it,
and stored away only when cold.
Health and Safety
considerations
·
Bleach – use in a well ventilated space; take
care not to mix with other cleaning products as this can emit lethal fumes;
store and use well away from pets (and small children).
·
Dyes – wear latex gloves to protect skin from
damage or staining; wear protective (or old) clothing. Keep well away from food
preparation areas and use tools and utensils not used in the kitchen. Store
securely away from pets (and small children). Clean tools and containers
thoroughly after use.
·
Craft knife and rotary cutter – always cut away
from your body; use a safety ruler with finger guard; retract/cover the blade
immediately after use; begin each new task with a sharp new blade; use light
pressure and several cuts rather than risking a blade breaking during use by pressing
too hard.
·
Sewing machine – follow the instruction manual
carefully; do not allow cables to become trip hazards; cover when not in use.
Costing
A4 sketchbook £4.99
Glue stick £1.99
Fabric for dyeing (IKEA) £4.00
Patchwork fabrics (printed) £15.00
Threads £7.90
Dylon cold water dyes £6.00
Pelmet vilene £2.50
Mountboard £1.00
Wall lining paper £3.99
Total £47.37
Timing
Date when embroidered item was started: 27.3.2016 - Date completed: 11.4.2016
A total of 26 weeks was spent on this module with an average of 7 hours per week. Considerably more time was spent during the last two weeks whilst constructing the box - approximately 30 hours in total with a further 12 spent on design work and sampling.
References
Strip Piecing by Valerie Campbell Harding
Shibori for Textile Artists by Janice Gunner
Blackwork Made Easy by Lesley Wilkins
Machine Embroidery - Stitch Techniques by Valerie Campbell Harding
Design Sources for Pattern by Jan Messent