We are asked to take each textured area in our chosen design and work out how it could be translated in a textural way with fabric manipulation and hand stitching.
Fig. 12:1
As we are instructed to use extreme contrasts, I have identified four separate areas in my design, with the two circular shapes or 'knots' being identical, albeit of different sizes. I do see areas 1 and 2 in the plan on the left above as being of a similar nature, both raised and ribbed, with area 3 being flat to act as a contrast. The two circular areas (4) will then be raised higher again, possibly with the aid of beads beneath the pieces.
With all this in mind, and looking at all the multitude of previous samples made for this module, I began stitching.
Fig. 12:2
Fig. 12:3
Fig. 12:4
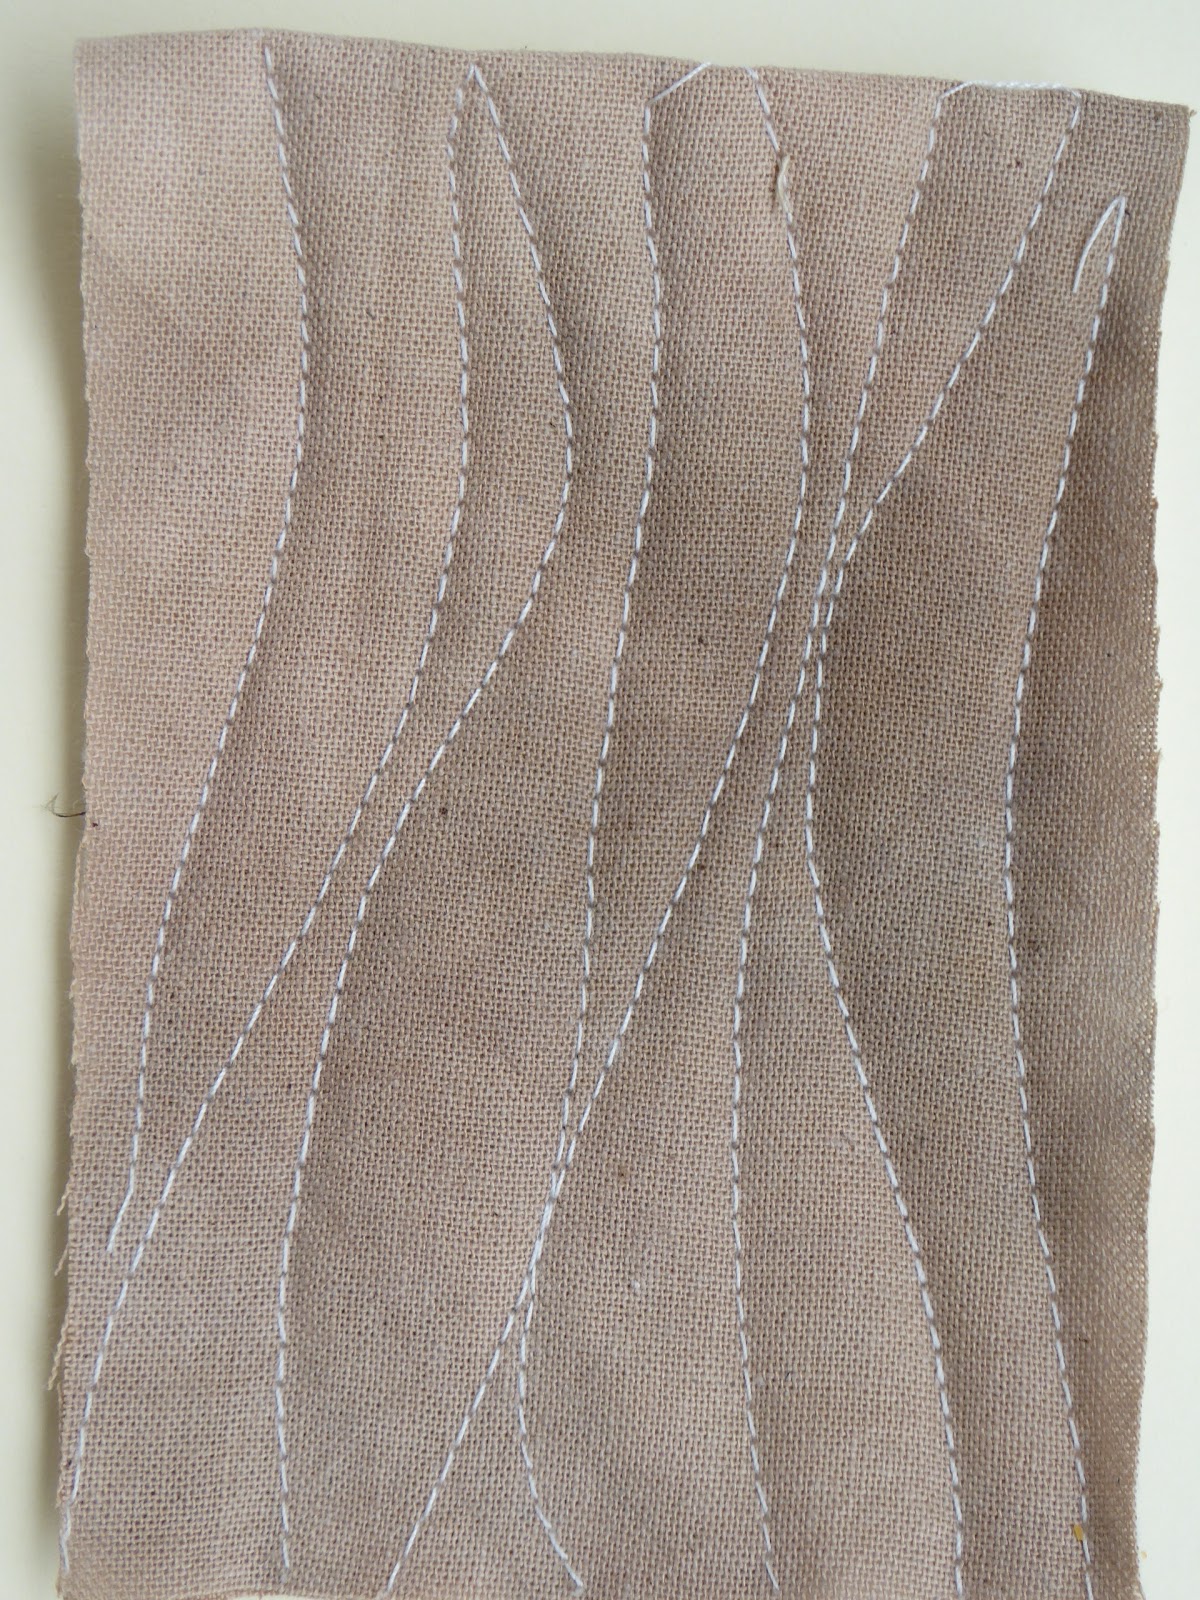
Figures 12:2, 12:3 and 12:4 show my ideas for sections 1 and 2 12:2 is a layer of scrim over a piece of quilt batting which has then been whip stitched to manipulate the fabric into deep folds. By altering the direction of stitch it is possible to distort the surface even more so there are raised bumps even between the ridges. This is a technique gleaned from Jean Draper's book Stitch and Structure and one I enjoyed learning though I feel that much more practice is needed to produce the impressive surfaces shown in her book. Fig. 12:3 is strips of the same hand-dyed scrim knotted and applied to a base fabric. 12:4 is a series of wrapped threads and gimp twisted and couched onto a base fabric.
I chose the two techniques in 12:2 and 12:4 for my two sections in the finished piece.
Fig. 12:5
Fig. 12:6
Fig. 12:7
Figs. 12:5, 12:6 and 12:7 show ideas for the flatter area No.3 in the design. 12:5 is a number of fabrics - silk, scrim, hand dyed cotton - five in total, which were stitched on the machine in wavy lines then cut through to different depths and rubbed to make the edges fray. 12:6 is layer upon layer of fly stitch using a wide variety of threads and Fig. 12:7 is two pieces of hand dyed cotton fabric sandwiched with quilt batting and quilted on the machine. As the brief stipulates hand stitch I opted to use the fly stitch technique for my final piece.
Fig. 12:8
Fig. 12:9
Fig. 12:10
Fig. 12:8, 9 and 10 are intended for the two circular areas or knots on my tree bark. 12:8 is hand dyed cotton furrowed, 12:9 is two yo-yos stitched atop each other and 12:10, my preferred option is a hand dyed ribbon gathered and couched randomly over the surface topped with a hand dyed thick rayon cord which has been looped and couched on top.
Fig. 12:11
In the midst of making my resolved sample the whole family went on holiday for ten days to the Isle of Skye and then to a cottage in the Black Wood of Rannoch on the edge of Loch Rannoch in the Scottish Highlands. Inspired by the glorious scenery and the information that The Black Wood is also known as the Singing Forest, I decided to add some words between the stitched pieces.
"The trees sing their siren songs
as the wind whispers its secrets
through their branches
in Rannoch's Black Wood."
Some detail photographs follow ...
Fig. 12:12
Fig. 12:13
Fig. 12:14
Fig. 12:15
Fig. 12:16
Fig. 12:17
Each section was stitched onto a piece of pelmet vilene cut to shape. In Section 1 (top left of the piece) I allowed the scrim to pull into holes in places to add further texture to the manipulated surface.
Section 2 is stitched onto a piece of slub silk fabric which I didn't want to cover completely so have left some areas open to view to again add further depth to this section and to emphasize the texture of the wrapped cords. I used a variety of methods for making the cords. I wrapped different numbers of core threads by hand with a variety of threads, some matt, some shiny. I wound gimp through and amongst these and then knotted and twisted and couched lengths of extra chunky knitting yarn, again twisting some areas with the gimp and wrapped cords.
Section 3 uses a wide variety of hand dyed threads fly stitched onto a piece of hand dyed cotton fabric and the two circular pieces are raised up on buttons, the large one (top left) on quite large wooden buttons and the smaller one on smaller buttons to again give a variation in height and added interest to the piece.
Evaluation
I am extremely satisfied and absolutely delighted with the results of this piece. It fulfils the design brief - the embroidered section measures between 20 and 30cm and reflects the topic of texture in landscape - in my case tree bark. I am pleased to have been able to link it to a very memorable holiday (celebrating a 'special' birthday) and will frame it and hang it on my wall as a memory piece. It is also all hand stitched, again fulfilling the brief.
If asked to make it again I think the only change I would make might be to practice the whip stitching a little more to make more of the top left hand section. I am aware that there are no frayed edges in my piece, which is something which has been emphasised during this module, but it does reflect my personal style, whilst being slightly less 'controlled' than some of my work.