Wednesday 8 November 2017

Three artists and admin


Authentication


Health and safety:

·         Take normal levels of care whilst using electrical equipment i.e. don't leave electrical cables trailing across floor or work space.
·         Equipment for dyeing and paper-making should be kept separate from general kitchen equipment to avoid contamination of foodstuffs.
·         Clean up any spillages immediately and do not allow water to come into contact with electrical appliances.
·         Wash all equipment thoroughly after use to ensure they are clean and ready for action next time you come to use them.
·         When bonding fabrics ensure that baking parchment is used beneath and on top of the fabrics being bonded to prevent damage to your iron.
·         Work in a well-ventilated space with water close at hand when using candles/matches and other heat tools.
·         Work on a heat-resistant surface when using heat tools.
·         Use the correct heat for the fabric being used when using an iron, and keep fingers out of the way – especially when using steam.
·         Cover all surfaces with plastic sheeting as well as newspaper when using Brusho inks, dyes and other paints.
·         Use a cutting mat when using a craft knife to cut papers, together with a non-slip ruler. Replace the blade regularly to ensure a clean cut and always put the cap back when it is not in use.
·         Use a darning foot and embroidery hoop when doing free machine embroidery to protect your fingers and change the needle regularly.
·         Always, always keep pins, needles and other sharp items away from pets and young children. 

Storage of materials:
Design work in progress: kept tidily in workspace away from sun, dust and moisture. Embroidery in progress is kept in a pocket/folder together with the relevant threads and needles.
Completed embroidery: Placed in sketchbook or display folder.
Completed design work: Placed in sketchbook
Inks and paints: upright in the allocated drawer in my garage workroom.
Other items - glue, bleach etc: Upright in wall cupboard in garage workroom out of reach of pets and children.
Fabrics: Those required for the current project are kept in a basket together with threads and other items so they are to hand when needed.
Sewing machine: Kept on sewing table in my sewing room with its cover in place and wires stored neatly.
Other electrical equipment (Iron, blender etc): Allowed to cool after use then stored on the workbench in my garage workroom.

Costings
Blender ...... £18.99
Linen scrim ..... £3.75
Other fabric and threads from my existing stock ... estimated cost approx £6

 Timings
Chapter 1 -  2 hours
Chapter 2 -   6 hours
Chapter 3 -   1.5 hours
Chapter 4 -   8 hours
Chapter 5 -   7 hours
Chapter 6 -   12.5 hours
Chapter 7 and 8 - 8 hours
Chapter 9 -   3 hours
Chapter 10 - 6 hours
Chapter 11 - 14 hours

Sunday 5 November 2017

Making a book


In the process of making the final book a few things still changed, despite all the sampling and planning, though I think this is perhaps inevitable as some ideas developed as I went along and others simply didn't work out.

I began by preparing the three sets of pages for my book. (I must apologise for the camera cord  which I hadn't noticed was in the frame when I took these photographs, and hope it doesn't obliterate too much of the image).

Fig.1

For the first internal page I stamped my agapanthus image onto two sheets of organza fabric before stitching one piece with the words 'garden of memory' and the other with the words 'garden' and 'memory' randomly across the fabric. The intention was to mimic the lettering sample No. 10 in Chapter 2. I left the loose ends of my threads floating across the page. Once the stitching was complete I stitched the two pieces of fabric together around the edges with a bead decorated buttonhole stitch.
 
Fig. 2

The second internal page was stitched in a very similar way to the first but this time I printed a photograph I had taken of the gold ballroom in Pushkin Palace in St Petersburg onto a third piece of organza. I then cut this into strips and bonded it onto a second piece of organza before stitching it with the words 'palace' and 'dreams'. The other side of this page has the words 'palace of dreams' embroidered randomly over it.
 Fig. 3
I tried many different arrangements of my family photographs in an attempt to make a collage of the faces, but as they are all different sizes and poses, it proved impossible to make them look as good as I needed them to. In the end I admitted defeat and decided to have each photo printed onto a separate page of calico.
Fig. 4
I machine stitched a frame around each photograph then hand embroidered my quotation throughout the pages.
 Fig. 5
I added rows of decorative machine stitching onto some of the pages

 Fig. 6
and stitched the pages together at the edges with a buttonhole stitch. I didn't add beads this time as I felt there was already enough decoration on these pages.

 Fig. 7
I then sewed the pages together into a simple eight page pamphlet on the machine.

 Fig. 8

Fig. 9
Figures 8 and 9 show the dividing pages of the book - a piece of linen onto which I painted wide blue stripes with cold water dye to reference lined writing paper. After a couple of practice attempts I decided to bite the bullet and machine stitch my quote. In Fig. 8 you can see that I have started to work seed stitches into the centres of some letters to echo Sample 19 of my lettering samples in Chapter 2.

 Fig. 10
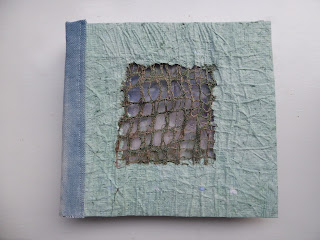
The outer covers are made from hand made paper, each bonded to a piece of machine embroidered pulled work. Fig. 10 shows the cover which sits over the 'Palace of Dreams' side of the finished book. In order to reference the palace I machine stitched over a piece of canvas from which a grid of threads has been removed. I then worked hand embroidery over the grid in some areas.

Fig. 11
Fig. 11 shows the cover which sits over the 'Garden of Memory' side of the book and has a much more organic panel embedded in the paper, this time made from a piece of machine embroidered scrim to reference a tangle of stems on a trellis.
Figures 12-21 show the completed book as I turned the pages.

Fig. 12
 
Fig. 13
 
Fig. 14

Fig. 15
I stitched lines of running stitch around the words on the linen pages.

Fig. 16

Fig. 17

Fig. 18

Fig. 19

Fig. 20

Fig. 21

Fig. 22

Evaluation of final piece of work
Overall I'm very happy with my finished book, though were I to make it again I would probably enclose a piece of pelmet vilene between the two linen pages to stiffen the back. The book works well in the hand but trying to stand it up in order to display it for the purposes of this blog proved tricky with the soft centre. 
 
That being said, however, I feel that the book I've made uses many of the techniques learned throughout this module. I had never made paper before but I found it fun to do and ended up with some interesting papers to use in sketchbooks and the like in future. I had done some pulled thread embroidery by hand in the past but never on the machine, and I thoroughly enjoyed exploring this technique, making some interesting discoveries whilst working with canvas along the way. I had also never plucked up the courage to try free machining lettering before and was pleasantly surprised by the results I achieved.

I also feel that for this module I finally embraced the process of exploring and experimenting with a technique through sampling without having a fixed finished piece in my mind and I think that the book has benefited from this. Without all the sampling I would probably have fallen back on tried and tested methods of book making that I have used in the past. I'm delighted that I now have another book to add to my collection - one that is different from all the others - and one which adds to my work on my family history.


Thursday 21 September 2017

Chapter 11: Final book plans

Throughout this module I haven't really had a clear idea of what my final piece would be. I've just been enjoying making all the samples. And while that was great at the time, I've now reached the point where decisions had to be made. It's taken me a while! As always, August and September were taken up with family so that has also added to my indecision in a way as I've not really had the clear head space to concentrate on coursework. Not that I'm complaining! It's been a good couple of months.

However ... I knew that my book would have to have meaning for me, but, as I've made so many books in the past (I showed a small selection of them in my last post), finding a topic that fit the bill and fit with the requirements of the course took a bit of thinking about. In the end two things aided my decision ... a tub full of agapanthus in my garden which flowered like crazy for weeks on end gave me my colour scheme of blue and green, which also chimed with the insides of the business envelopes which attracted me back in Chapter 1. And a quote from Alice in Wonderland that I came across by accident whilst browsing Pinterest one day ... "In the garden of memories, in the palace of dreams, you and I will meet again."

My mind played with the quote for a while and came up with an idea for a book about the members of my family who have died. I've done quite a lot of work on my family history over the years and this seems fitting.
Fig. 11:1

My intention is to make a book which folds in on itself from both left and right so the front covers meet in the centre. The left hand cover will have a piece of machine embroidered pulled threadwork inserted in the centre (cut into paper in the photograph above)  as in Fig. 6.10 in Chapter 6, while the right hand cover will have a piece of machine embroidered trellis work as in Fig. 6.9 in the same chapter.

I intend to make the back cover from stitched fabric with layers of embroidered decoration. The inside back cover will have my photographs ...

Fig. 11:2

In the photograph above the images aren't fixed down but my intention is to fade these slightly and print them onto some silk paper which I made at a workshop a couple of weekends ago, in the hopes that this will make them look aged and fading slightly more.

Fig. 11:3

I made two stamps of my agapanthus flowers from self-adhesive foam sheet stuck onto card, which I then stamped onto tracing paper for the purposes of this paper mock-up.

Fig. 11:4

I then wrote part of my quotation amongst the flowers

Fig. 11:5

In the finished book this will be printed onto a transparent fabric (silk voile?) and the words will be embroidered. The idea is that the pages will then sit between the photographs and the windows in the front cover, making the photographs fade even further into the distance, like distant (and some not so distant) memories.

The right hand pages (no sample of these I'm afraid will have images of a palace (possibly some of my photographs of Hampton Court) with the words 'In the palace of dreams' embroidered around them. 

The whole book will measure approximately 6" tall by 12" wide.


Wednesday 23 August 2017

Chapter 10: Books

I love making books and have made quite a few over the years...

Fig. 10.1 

Fig. 10.2

Fig. 10.3

Fig. 10.4

Fig. 10.5

... I find them a useful vehicle for stitching samples, to illustrate a poem or a topic that has relevance to me, or just a place to play with a new technique. When you've been stitching for as long as I have you don't have a great deal of wall space left to display your work and a book sits on a shelf and takes up a very small amount of space.

For this chapter we had to make samples of books which we might (or might not) end up using as our final piece of work for this module.

Fig. 10.6
 I began by working some samples of Japanese stab bindings ... and might have got a little carried away!

Fig. 10.7
I know that in theory the binding is supposed to look identical on the back and front (or at least make an equally attractive pattern on the back of the book) and not all of these do that as. There are a couple where I just could not work out how to do the journeys up the binding and back in the same way, and some I think were just a little over-ambitious.

Fig. 10.8
 Fig. 10.8 shows just two examples made up into actual books.

Fig. 10.9
My next little group of books were made to a simple pamphlet design. The one on the left is a single pamphlet with a cover.

Fig. 10.10
The second little book in Fig. 10.9 is made up of 5 pamphlets which were stitched together over ribbons, which were then threaded through slits cut in the cover and the ends glued in place to hold them firm.

Fig. 10.11
The right hand book in Fig. 10.9 has pages of different lengths, which make an attractive little book where you can see glimpses of what is on each page.

Fig. 10.12
This book has pages glued into a concertina'd piece of paper, which was then attached to the back cover.

Fig. 10.13
Fig. 10.13 shows two books where the cover is a longer piece of paper folded to enclose two little pamphlet books. I think this, or a variation of one of them, might be a definite contender for my final piece!

Fig. 10.14
A couple of years ago I went on a two day book-binding workshop at our local art supply shop and this was one of the samples I made there. It is a 'proper' book with board covers and a spine of bookbinders linen.

Fig. 10.15
These are two more samples made at the same workshop. The green one again has board covers with a separate piece of board as a spine covered again in bookbinders linen. The purple book is a concertina with board covers attached.

Fig. 10.16
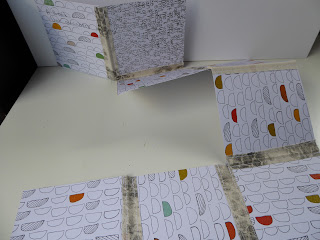
The book in Fig. 10.16 meanders along, each page is attached to the next with a strip of fabric which has been machine stitched to each pair of pages. A variation on the 'puzzle' books which follow!

Fig. 10.17

Fig. 10.18

Fig. 10.19

Fig. 10.20

Fig. 10.21

Fig. 10.22

Fig. 10.23
The books in Figs. 17-23 were each made from a single sheet of paper which was cut into in various different ways then folded up. I love making these from paper on which I've made random marks as the resulting pages often end with lovely abstract designs which just inspire me to want to stitch.

Fig. 10.24

Fig. 10.25

Fig. 10.26
The tiny book shown in Figs. 10.24-26 is another of these single sheet books to which I then added  the words of a poem which meanders through the pages. I attached a piece of ribbon to fasten it all together. This would be another option for my final piece though I can't immediately see how I could manage to make my own paper to the size required.

Fig. 10.27

Fig. 10.28

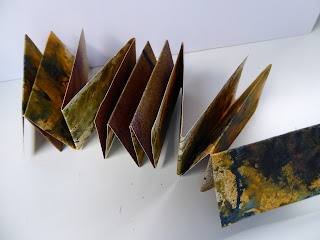
Figs. 10.27 and 10.28 show a little concertina book which has some pages folded back into triangles. I attached covered card covers and a hand-dyed tag on each cover to allow it to be held closed.

I suspect that I might have enough samples here to enable me to make a choice for my final piece but I find the whole process of making books so addictive and have several books on the topic, including one which has "100+ binding" so could continue for some time!!