Sunday, 29 April 2018

Chapter 9b: Rubbings

We were also asked to take rubbings from our relief surfaces and these are shown below.

Fig. 9b:1

Fig. 9b:2

Fig. 9b:3

Fig. 9b:4

Fig. 9b:5

Fig. 9b:6


Fig. 9b:7

Fig. 9b:8

Fig. 9b:9

Fig. 9b:10

Fig. 9b:11

Fig. 9b:12

Samples 10, 11 and 12 were taken from stitched samples worked in chapter 5.
There were several other rubbings taken but I have selected the most effective ones to show here as some were far less successful.

Chapter 9: Threads and stitchery

This chapter begins with a collection of neutral threads. My threads are all kept wound onto cards and 'filed' in boxes according to colour and type so it was a relatively easy job to gather the white threads from my stash.

Fig. 9:1 Neutral coloured threads

Added to these, though not included in the image, I have silk ribbons, garden string, piping cord, knitting yarn and machine thread.

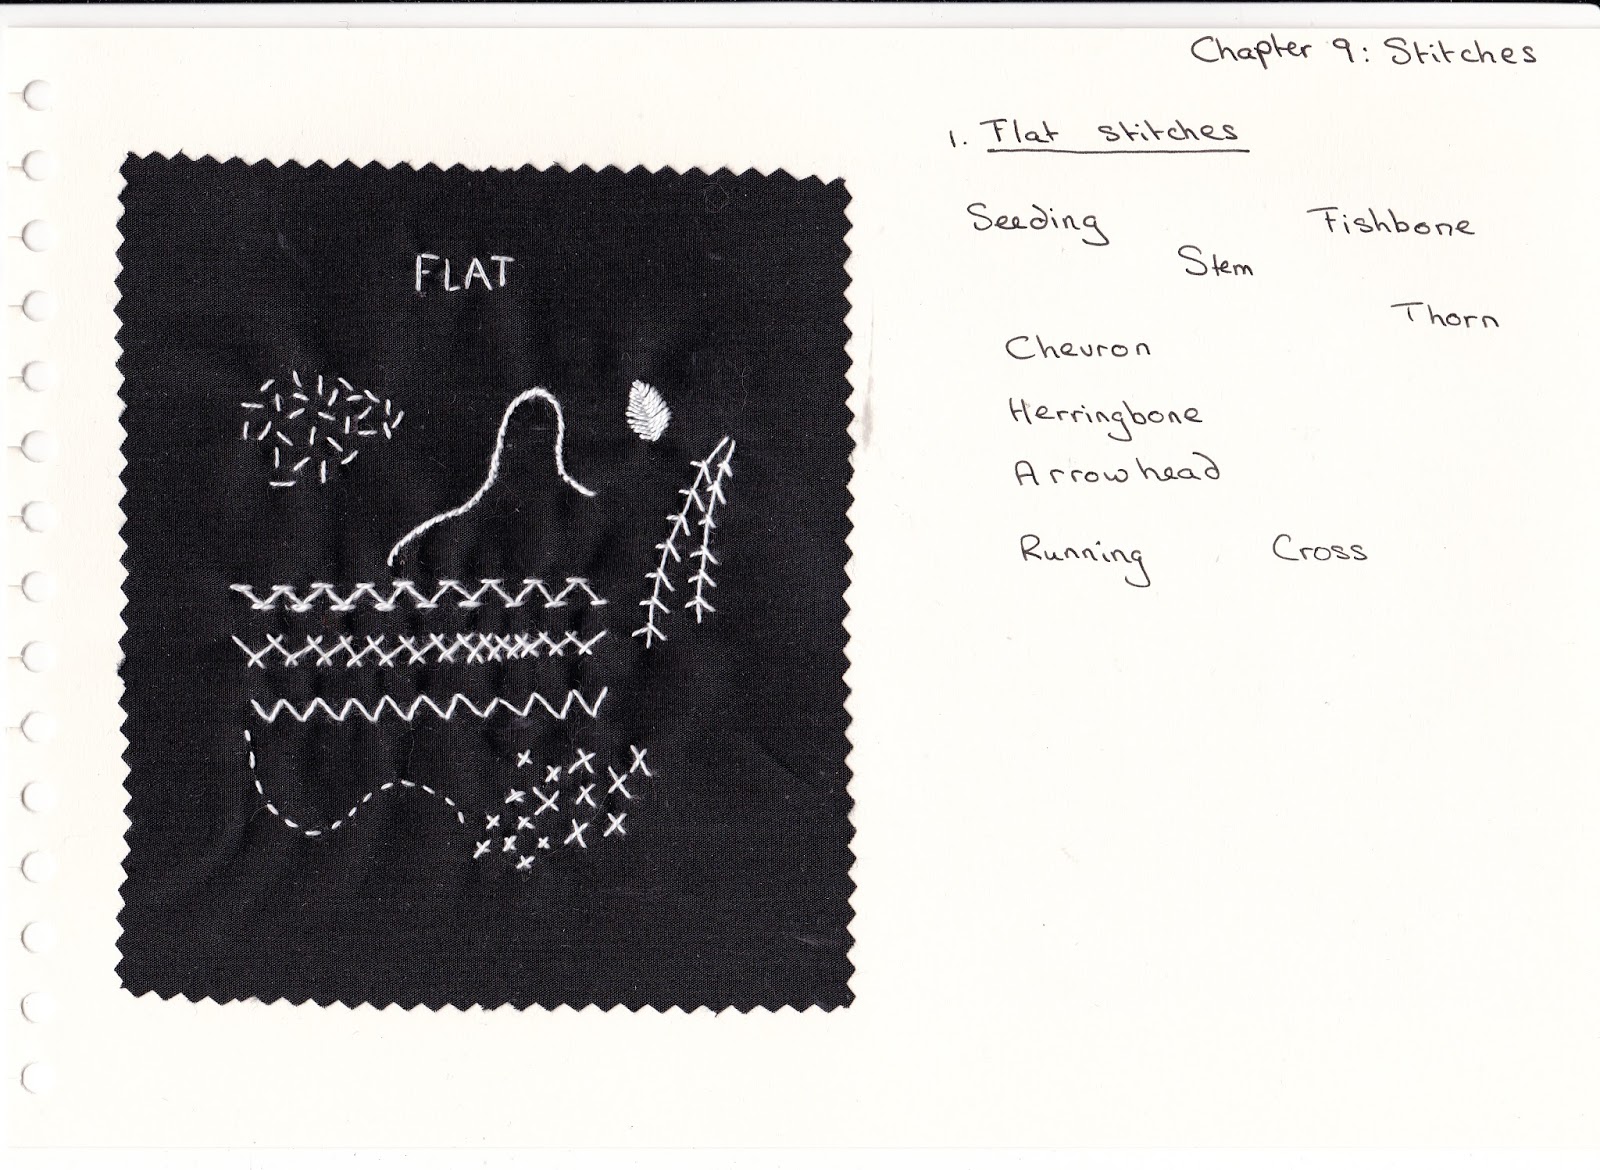
We were then asked to learn new stitches. I chose to make a series of small samplers using the five headings suggested in the notes.

Fig. 9:2 Flat stitches
Seeding stitch; stem stitch; fishbone stitch; chevron; thorn; herringbone; arrowhead; running stitch and cross stitch

Fig. 9:3 Looped stitches
 Buttonhole stitched in a straight row; a curve and a circle; fly stitch; fly filling; closed and open wave stitch; cretan and open cretan; leaf stitch; feather stitch - normal, single, double and closed.

Fig. 9:4 Knotted stitches
 French knots stitched normally and with long tails; bullion knots stitched in a row, a pile, a star, a rose, as seeding and a triangle; coral stitch; zigzag coral; tied coral; diamond stitch and diamond filling; hollie point (much more effective when stitched on a lace pad rather than on cotton fabric!!!); knot stitch and 4-legged knot stitch.

Fig. 9:5 Chain stitches
 Chain stitch; detached chain; double chain; feathered chain; heavy chain; open chain; twisted chain and zig-zag chain; wheat ear stitch and detached wheatear; split stitch and braid stitch.
Fig. 9:6 Composite stitches
Running stitch whipped and laced; raised stem band; raised chain; raised chevron; interlacing; interlaced Maltese cross (what a puzzle this was to work!!); needleweaving and whipped chain.


Many of these I have used in the past though not frequently and it was a very useful exercise to re-acquaint myself with some of them. Some I had never even heard of before, let alone tried so there was a definite learning curve involved too.

I chose to explore Cretan stitch in more depth as it was a stitch I was unfamiliar with and I found it to be surprisingly versatile. This is an exercise I may return to in future with other stitches just for the fun of exploring what various stitches are able to do.

Fig. 9:7
 Cretan stitch worked in a linear pattern; as individual marks; varied sizes and thickness of threads; open and closed; interlocking; loosely worked; dovetailed; beaded and wrapped with different threads.

Fig. 9:8
Cretan stitch worked as a spiral; stitched in different directions using different thicknesses of thread; stitched in blocks of different sizes and thread thickness; large open, overlapping stitches; used as a couching stitch over thick threads; stitched in a rough circle and interwoven with ribbon; different numbers of beads on different sections of each stitch and interlocked stitches using different thicknesses of thread and laced with beads.

Chapter 8: Paper relief into fabric relief

For this chapter we were asked to refer to the paper relief surfaces made for Chapter 3 and to translate five of these into different manipulated fabric techniques.

 Fig. 8:1
Tight rolls of linen fabric stitched in an irregular pattern to translate the peeling bark on this tree and the curled paper of the originals.

Fig. 8:2
Pin tucks were stitched at different angles on a polyester cotton fabric. What doesn't show up on the photograph is the irregular raised weave of the fabric which was the reason I chose this particular fabric as it mimicked the tracery of the bare tree branches and the smaller creases in the crumpled tissue paper.

Fig. 8:3
A somewhat more effective - and more literal - translation of the tree branches, this time worked on a fine organza. Channels were stitched on the machine and then threaded through with several thicknesses of a brown woollen yarn.

Fig. 8:4
 Irregularly shaped pieces of thick woollen felt were trapped beneath a piece of thin silk fabric and each piece was closely edged with backstitch to form raised patches.

Fig. 8:5
I formed irregularly shaped 'scales' from a variety of fabrics - thin cotton, silk dupion and cotton poplin. These were then overlapped and stitched in place to imitate the scales on this tree bark. 

Fig. 8:6
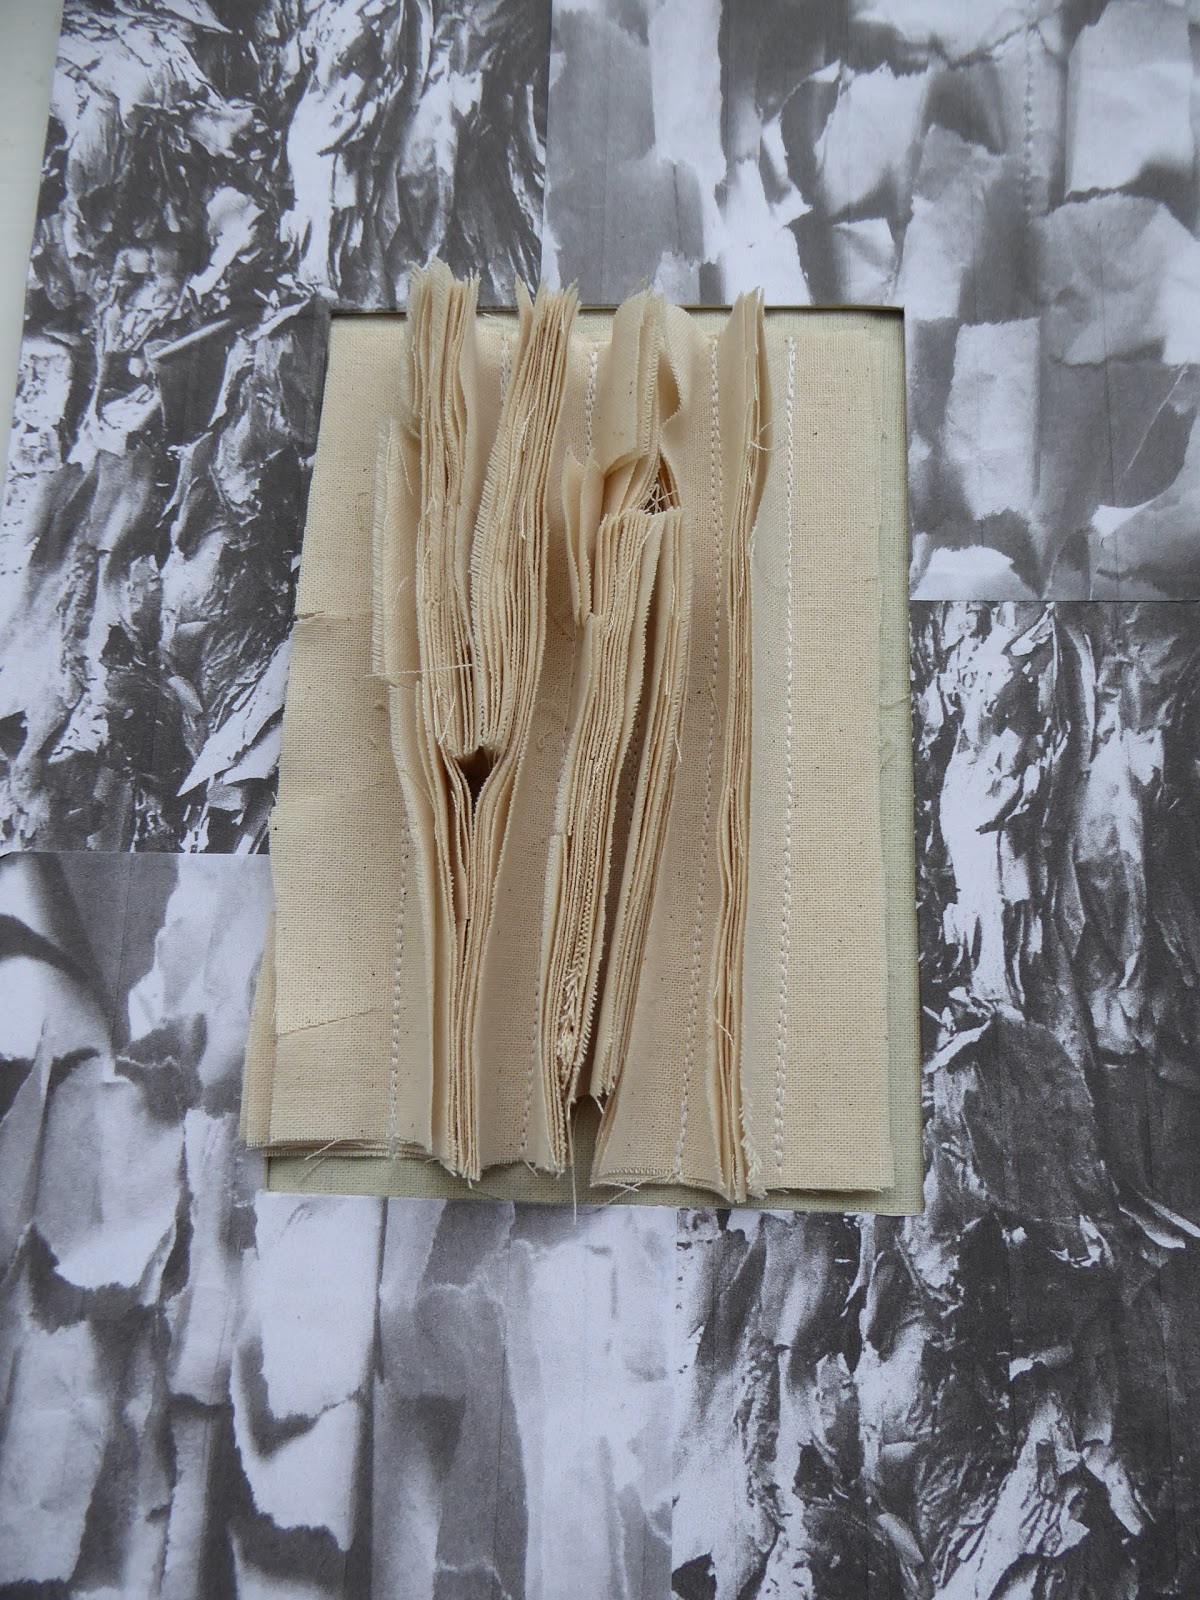
Layers of calico strips were stitched down very closely together so they stand up and the edges of the fabric were then lightly frayed to imitate the tree bark and torn strips of paper.

Fig. 8:7
Deep tucks stitched with several rows of machine stitch were then cut across to form notches to echo the papery scales of this tree bark.

 Fig. 8:8
 Lengths of a very chunky brown wool yarn were trapped beneath fine silk and stitched into a pattern which echoes the knots and pattern on this tree, and the deep creases of the paper.

Fig. 8:9
My favourite furrowing again, using a cotton curtain lining fabric which imitates perfectly the deeply grooved bark of this tree.

Samples 8:3; 8:4; 8:8 and 8:9 are particularly successful at imitating both the original photographs of tree bark and the paper interpretations, I think. 8:2 would definitely have been improved with more work - probably with added stitches on top of the tucks and with hindsight, of course, I should have made more scales for sample 8:5 to completely fill the space available.

Chapter 7: Tactile contrasts

We were asked to make a sampler using different fabrics manipulated in different ways so that each patch differed from its neighbour.


Top row: Left to right:
1. Strips of calico with frayed edges were stitched in piles down the centre of the strips.
2. Muslin was backed with a layer of quilt wadding and a piece of thin calico then quilted using a set machine embroidery stitch
3. A square of calico backs a piece of silk velvet twice the size. The velvet was gathered around the edges to fit then stitched down at irregular points to cause furrowing.
4. A group of small yo-yo's made from calico.

Second row: Left to right:
1. Strips of muslin are knotted at irregular intervals and couched onto a square of calico.
2. Deep pin tucks are stitched with several rows of machine stitch to make them stand up.
3. A layer of organza was stitched onto calico backing and stuffed with tiny cotton balls
4. Diagonal tucks were stitched in calico then stuffed with toy filling

Third row: Left to right:
1. Two layers of thin cotton fabric were stitched horizontally then the resulting tubes stuffed with cotton wadding.
2. Strips of folded calico have been stitched along the length then woven to form a basket weave.
3. Strips of gathered muslin were coiled and manipulated and couched in place
4. Strips of fine cotton fabric were stitched across at regular intervals allowing soft folds to form

Bottom row: Left to right:
1. Fine pin tucks on medium weight calico
2. Furrowed thin cotton fabric worked in a similar way to the velvet on the top row.
3. Fine cotton padded with quilt wadding was quilted to form quite a flat surface
4. Strips of thin calico were rolled tightly and stitched in place.

I really enjoyed making these samples and ensuring that each one feels very different to the touch. My favourites have to be the silk velvet, the gathered strips of muslin on row 3 and the yo-yo's. I had not done furrowing before but love the effect that this gives and it is interesting to see the difference between the beautifully soft silk velvet and the much crisper cotton fabric.

Monday, 5 March 2018

Chapter 6: Tucks, pleats and gathers

For this chapter we were to produce a range of samples showing a wide variety of methods for tucking, pleating and gathering fabric. I have to admit that I got in such a muddle with the quantity of samples that I was producing that I ignored the instruction to not rush into mounting them in my sketchbook as I just felt I had to find some sensible way of organising them.
 
Fig. 6:1
Sample6:1 - basic straight tucks - machine stitched on calico 1/4" away from the fold.

Fig. 6:2
Fig. 6:2 shows from left to right - a series of very narrow pin tucks, three tucks stuffed with lengths of tapestry wool (not visible on the photograph but the wool strands do stick out at the edge of the fabric) and a group of high tucks with three rows of stitching. Probably due to the fact that I worked these on a lightweight calico the high tucks rather disappointingly don't actually stand up as I had hoped. A firmer fabric might help them to achieve this.

Fig. 6:3
Fig. 6:3 - Wide tucks stitched across in alternating directions to form textural folds. If this were done in a more random pattern this could produce even more interesting textures.

Fig. 6:4
 Fig. 6:4 - Narrow tucks with more tucks stitched at right angles with the original tucks being folded in different directions. This has succeeded in making the vertical tucks stand upright and produces a very interesting three dimensional surface.

Fig. 6:5
 Fig. 6:5 shows quite wide tucks stitched down using a contrasting variegated thread, this time producing a more haphazard texture as the wider tucks fold and crease.

Fig. 6:6
Fig. 6:6 - I stitched over the folds of the quite narrow tucks with a narrow zig-zag stitch before stitching across as before and this has produced a beautiful wave pattern.

Fig. 6:7
 Fig. 6:7 - Another sample where I've combined the previous two samples

Fig. 6:8
Fig. 6:8 - A series of tucks stitched across at right angles with more tucks to produce a grid-like pattern.

Fig. 6:9
Simple, quite wide tucks with the narrow zig-zag worked over the folds

 Fig. 6:10
 And, again, the narrow zig-zag edges but this time hand stitched into a honeycomb pattern to look a little like smocking.

 Fig. 6:11
Fig. 6:11 - Time to move on!! and this time a series of short tucks stitched randomly across the piece 

Fig. 6:12
 Fig. 6:12 - Tucks formed on the bias of the fabric with a single tuck made at right angles.

 I'm not entirely sure whether American smocking, counts as tucks or pleats but I couldn't resist trying out a few examples.
Fig. 6:13a


Fig. 6:13b
Fig. 6:13a and b - This design is called Arrows. The loops on the diagram show which points of the grid are joined together to form the pattern.

Fig. 6:14a


Fig. 6:14b
 Fig. 6:14a and b - Simply called Grid, this produces an interesting design of parallel and overlapping bars.

Fig. 6:15a


Fig. 6:15b
And finally Fig. 6:15a and b is called Lattice.

Fig. 6:16
 The next two samples show simple formal pleats, where the folded fabric is stitched only part way down the length - 6:16 is knife pleats

Fig. 6:17
and 6:17 box pleats. Either side can be used as the 'right' side.

Fig. 6:18
Gathering: Fig. 6:18 shows a sample where the fabric was machine gathered in a zig-zag pattern and the folds then manipulated slightly to align them and form this interesting v-shaped design.

Fig. 6:19
Fig. 6:19 is known as Furrowing, where the top fabric is cut twice the size of the backing fabric, gathered to fit around the edges and then the fullness caught down with tiny stab stitches in a random way across the piece. Great fun to do and a lovely resulting texture!

Fig. 6:20
I borrowed a pleating machine from my branch of the Embroiderer's Guild to make these next few samples. Here I threaded two needles, and omitted one across the width of the piece (fine muslin used in all these samples).

Fig. 6:21
For Sample 6:21 I loosened several of the rows of gathering threads to allow the piece to be manipulated. This piece isn't stitched onto a backing but doing so would allow the manipulated surface to be managed better and made more permanent.

Fig. 6:22
A narrow band of traditional English smocking was worked across one end of this sample, and the remainder allowed to relax a little.

Fig. 6:23
 Bands of satin stitch were worked randomly across the surface in Sample 6:23. This is a lovely effect, especially with the use of a rayon thread which adds a sheen to the stitching, making them more obvious.

Fig. 6:24
 More traditional English smocking for sample 6:24. I haven't done smocking since my daughter was very young so it was fun to revisit a technique not worked for over thirty years! I couldn't resist using stitches that would allow the finished piece to mimic a little party dress.

Fig. 6:25
And finally ... two Yo-yo's - circles of fabric gathered around the edges and pulled up, the smaller one fitting over the centre of the larger to give added height and texture.